Acrylic Gourd Lamp Beads
From Turkey


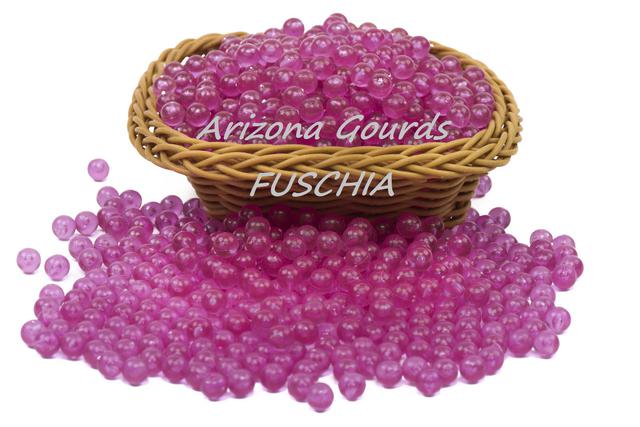
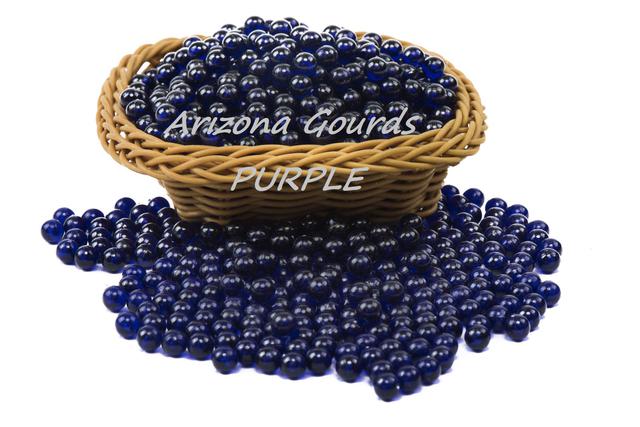

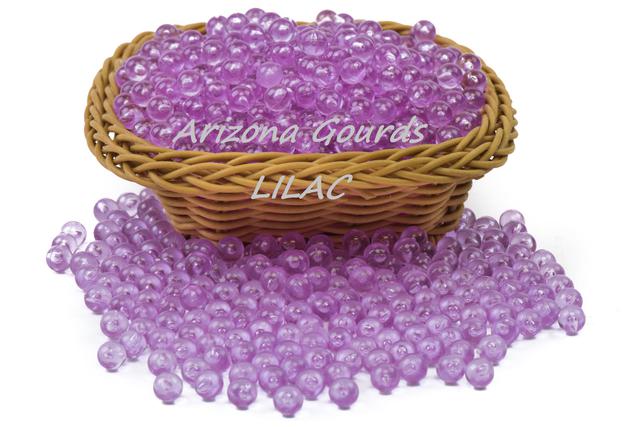
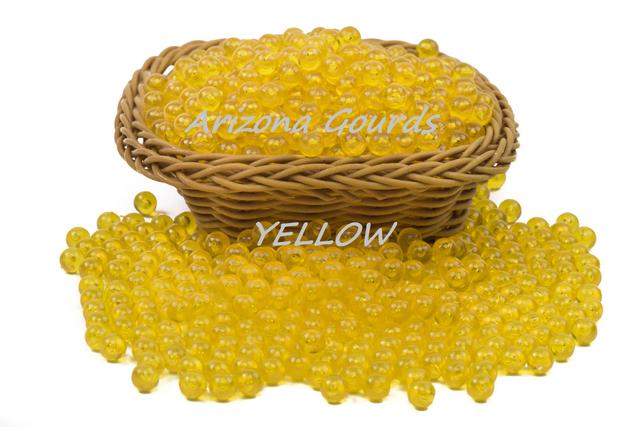
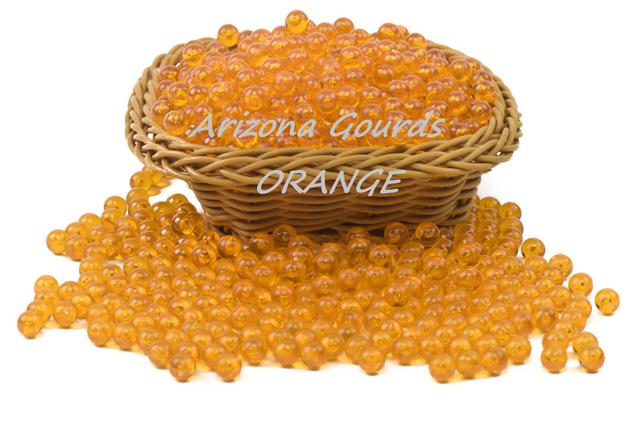

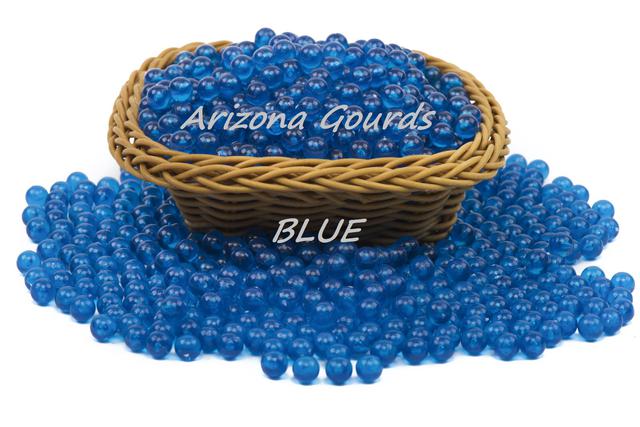
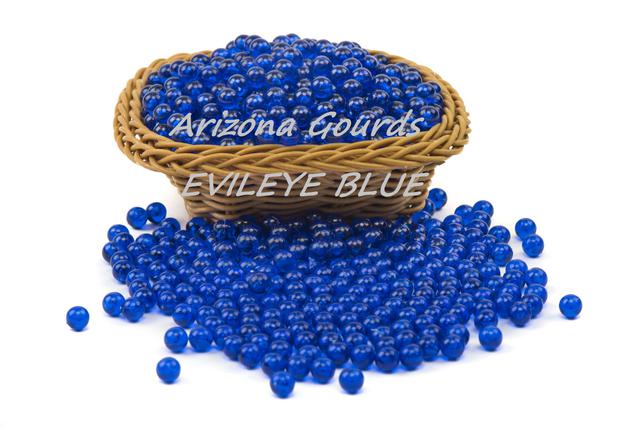
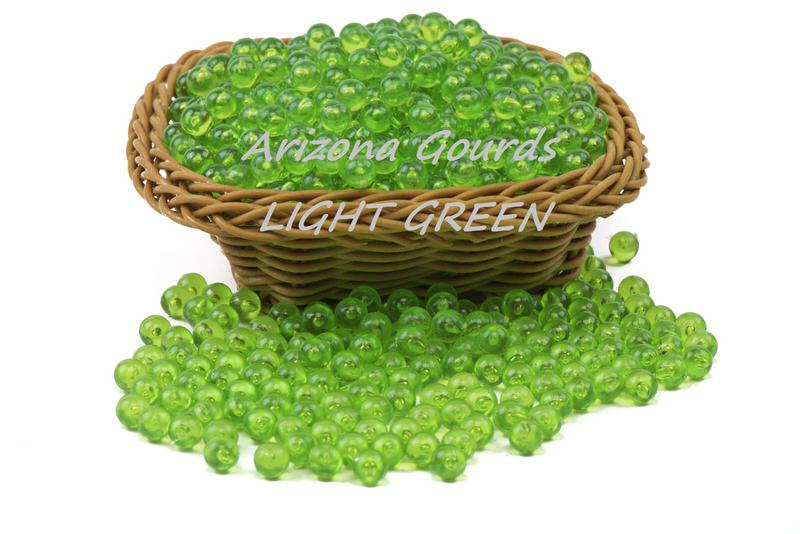
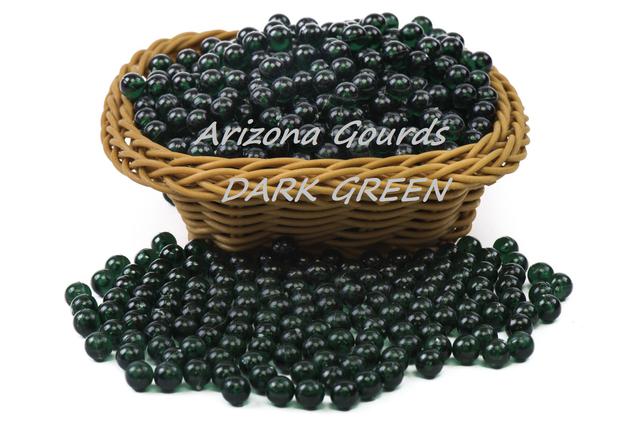


Available in 4mm, 6mm and 8mm sizes


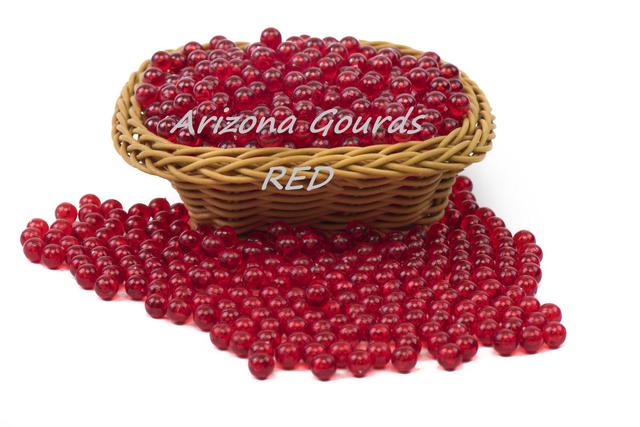
Beads are sold in bags of 100.
4mm
$1.25/100
6mm
$2.00/100
8mm
$2.50/100

4mm
4mm
4mm
4mm
4mm
4mm
4mm
4mm
4mm
4mm
4mm
4mm
4mm
4mm
4mm
4mm
6mm
6mm
6mm
6mm
6mm
6mm
6mm
6mm
6mm
6mm
6mm
6mm
6mm
6mm
6mm
6mm
8mm
8mm
8mm
8mm
8mm
8mm
8mm
8mm
8mm
8mm
8mm
8mm
8mm
8mm
8mm
8mm

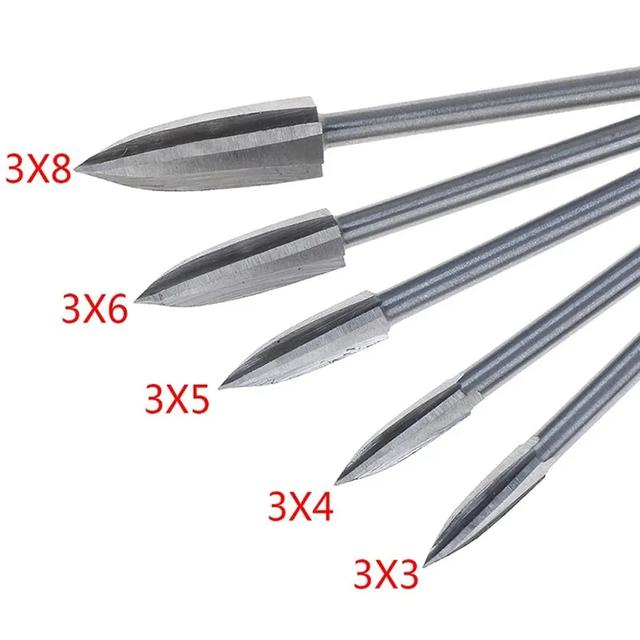
3 Blade Carving Burs
3mm Shanks
$5.00/ea
Single Fine Filigree Bur Carbide - Great for pilot holes
$5.75/ea

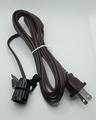
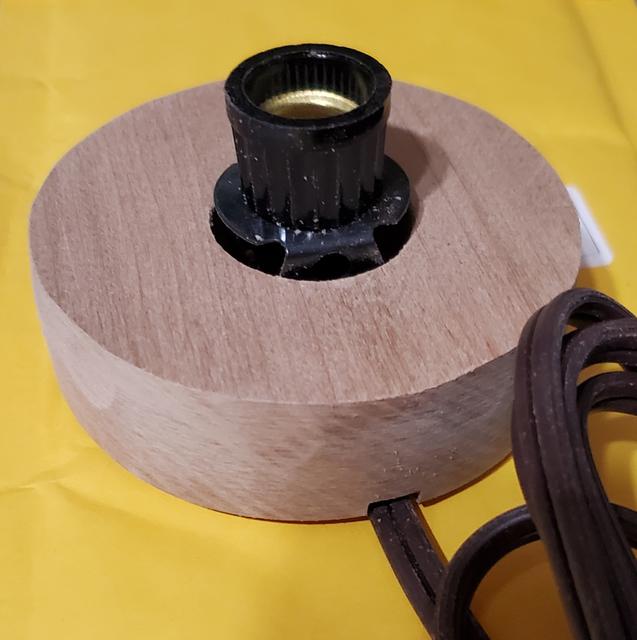
6 Foot Lamp Cord - Brown
Holds E12 Bulb
Roller switch is 15" from the socket
Socket fits 1" hole as per photo
$6.99
Coming Soon! Wood Lamp Bases

Gourd Lamp Bead Insertion:
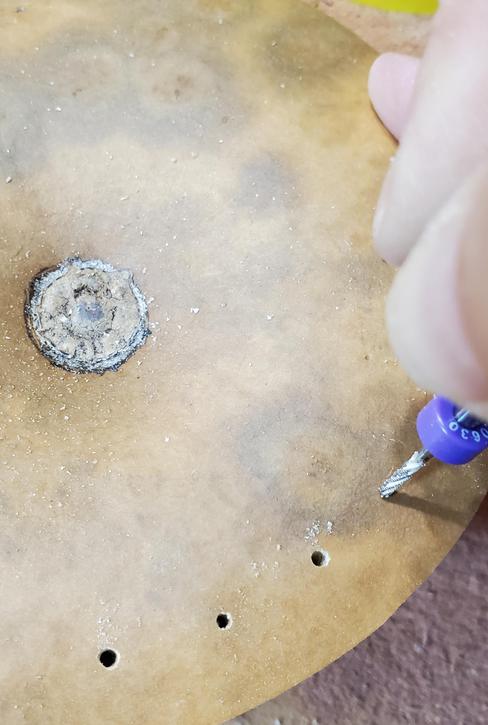
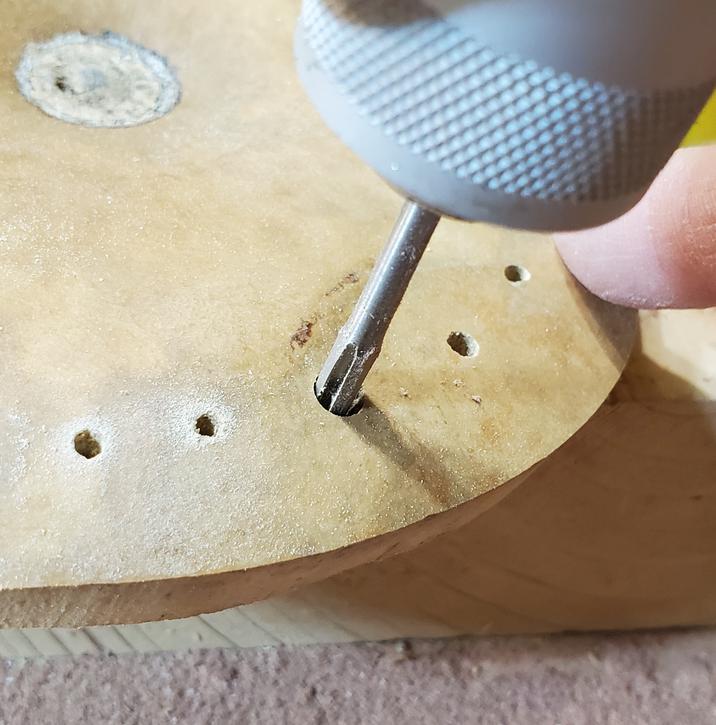
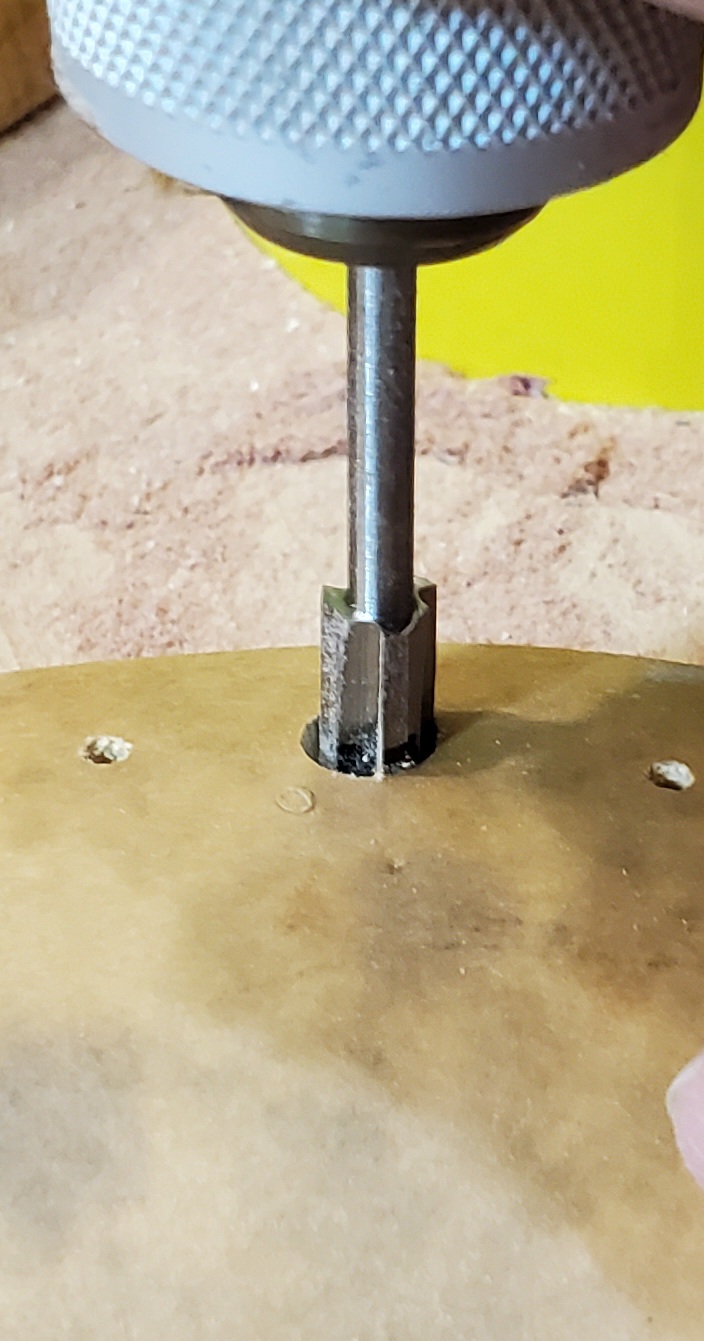
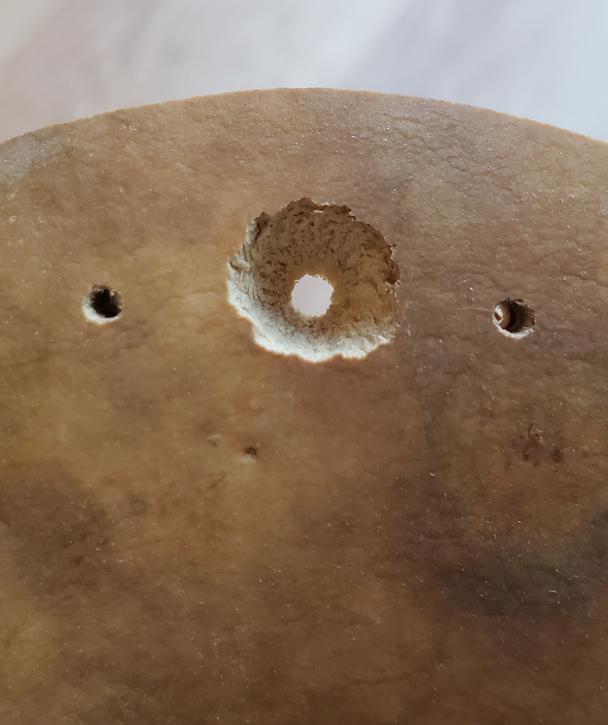
Cut the hole for your lamp base and clean the inside of the gourd. Save the cut-out to practice drilling the holes for your beads. It works well to start with a filigree bur to make pilot holes for your beads. You could also use a drill bit that is smaller that the size of bead you're going to insert. I find I have better control by starting with the bur stopped. Place the tip firmly where you want the hole to be making sure the tool is perpendicular to the gourd surface, then press the foot pedal and make the hole all the way through the gourd. Keep your drill running until you pull the bit back out of the gourd. You can make all of the pilot holes at once, then switch to the carving bur that corresponds to size of bead you're using. The carving bits are tapered which will allow you to make a hole that the bead can sit in like a nest. You won't want to plunge the bit all the way through to the widest part, as the hole may then be too big and allow the bead to fall through. (if you need to, you can always use a bit of glue that will dry clear to secure the bead) Test by putting a bead in to see if it's fitting snuggly or too proud. You'll find the thickness of the gourd will affect how deep you'll want to plunge the bur. Once you have an idea how deep you need to go (if the wall thickness of the gourd is pretty consistent), you can mark the bur with a marker so you know how deep to go. Remember to use the bur 90 degrees to the surface of the gourd and keep the tool running until you pull the bit out of the gourd. If you're using multiple sizes of beads, you can do all of the same size at one time, then switch to the next bit. After you've finished drilling holes, gently tap the beads into place.
Drilling pilot holes
4 mm hole with the 3 x 4 mm carving bur.
6 mm holes with the bit marked for depth.
This happens if you stop the bur before removing it from the gourd. Nothing a little QuikWood or PC Lumber won't fix. :)
The bead on the left is sitting a little proud. Smaller holes with no bead in them also add nice accents .
Please consider placing a minimum order of $25.00 in merchandise. Orders under $25.00 will require me to invoice you for the correct shipping amount.