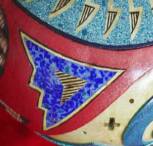
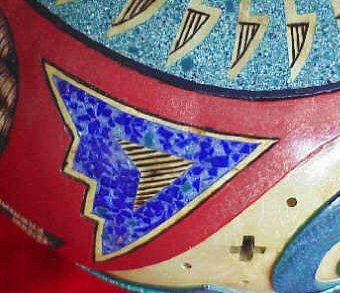
1) System Three Resin. After trying their two-part liquid product, I'd have to say that the System Three resin just is not something that would work well for gourd inlay. It is very thin and is almost impossible to use on a curved surface such as a gourd. I'm sure it would be great on level surfaces such as table tops. If you wait until it starts to get thick enough to actually stay where you put it on a curved surface, it sets almost immediately at that point and you can't work it into the area. I had to build up some dams with tape to hold the material in place, and even then I had to go back and reapply the resin a second time to replace areas where it had run out. I mixed this with some synthetic lapis stone granules, blue opalescent dye and a few metallic flakes.
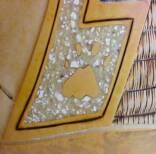
2) Epoxy 330. A substance I had good luck with was Epoxy 330 - Mfg. by Hughes Associates of Wayzata, MN. (Where I grew up!!) It is sold for use in jewelry inlay applications and doesn't yellow over time like some other epoxies. It comes packaged in two tubes - you mix equal parts from each tube. I mixed some crushed white synthetic stone granules and mica flakes in the mixture. I found this was easy to use, relatively inexpensive and sets quickly. This epoxy had a much thicker consistency than the System Three and mostly stayed where it was applied. You will need to paint the gourd underneath the inlaid area, or add dye to the epoxy. I tried using it without doing either of these things and found that the epoxy looked yellow because it picked up the underlying color of the gourd.
3) InLace. InLace is a product generally sold to woodworkers for decorative filling of gaps in burlwood bowls, etc. It works well for them as well as gourd artists because it comes premixed in various formulas and colors, and is thick enough to stay where you place it on a curved surface. It comes in some solid colors, clear, or mixed with synthetic stones which allow you to turn the material on a lathe or to sand it down. They also sell jars of synthetic stone granules and nuggets, dyes and metallic flakes that can be added to the mixtures. While this product is somewhat pricey, a little goes a long way. One can will do many gourd projects. InLace tends to be the most strong smelling of the three mixtures, and wearing a respirator while using it is recommended.
Using InLace and Resins for Inlay
So far, I have tried 3 different products for inlaying crushed stone/resin mixtures. There are many other products yet to try, but here are the results I obtained using these particular 3.
NOTE: Inlaying stone and resin is a very tedious and laborious process. Don't try this if you get frustrated easily or like to finish projects fast!
Inlaying with Resins - The Process
*A NOTE ABOUT SYNTHETIC STONE: Synthetic stone is a mixture of stone dust and resins. InLace sells jars of the granules and nuggets which are excellent to use. Some jewelry supply houses also sell blocks of this material that is used for jewelry inlay, but then you will have to crush it - easier said than done! If you use real stones, be sure to choose something that is very soft, such as turquoise. When you try to grind down extremely hard stone, it will not grind as quickly as the resin and you will have a very lumpy, uneven surface.
Step 1:
The first step is to cut a recessed area in your gourd to accept the inlay material. I use a small saw blade shaped Dremel bit to outline the area, and then use the cone and ball shaped bits to remove the rest of the material from within the outline. See the Carving and Inlay Tutorial page for more detailed information on bits, techniques, etc. The bottom of the recess does not need to be smooth or even, as the resin will cover it.
Step 2:
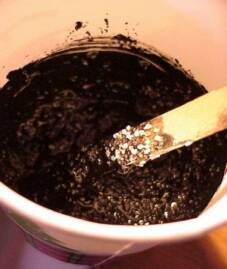
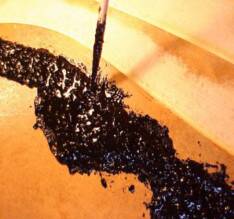
Mix your product according to the manufacturer's directions. Stir any added materials throughly into the mixture. Your working time will depend on the product you are using, but usually it is no more than about 15 minutes. Only mix what you can use in that amount of time. I usually only mix an ounce or less each time. Use wooden sticks and paper cups for your mixing so that you can throw them away afterwards.
In this photo, I am using black InLace to which I have added teal, turquoise and white granules. It will be hard to see the colored stones until after the mixture has cured and been sanded down.
Tip: If you are using Inlace, a good mixture is 40 drops of hardener to an ounce.
Step 3:
Once the material is throughly mixed, use the wooden stir stick to place the resin into the precut grooves. Use the stick to push the resin mix into the corners and edges of the cut area. Because the mixture is thick, you may get gaps if you don't work the material well into the recess. Over fill the area to allow for some settling and to prevent depressions after grinding the material down.
Step 4:
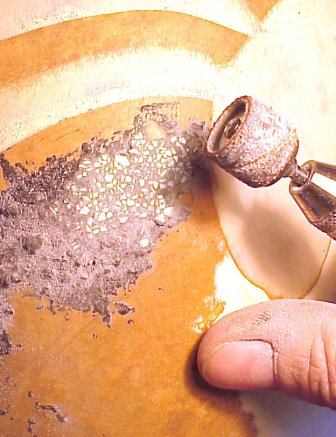
After the material is completely cured, you can begin grinding it level. You can use Dremel steel engraving cutters to remove large amounts of material, but a coarse sanding drum works pretty fast and allows less chances for accidents. When you get close to the surface of the gourd, slow down and go carefully. You can also switch over to a fine sanding drum. Finish by hand sanding with progressively finer sandpapers. The surface will look slightly dull, but you can finish by spraying or brushing on your favorite finish and that will shine it up.
*NOTE I now do most of the grinding with a mini disc sander. The sander has flexible backing disks and is less likely to "ding" the surrounding gourd surface as the inlace is ground.
Tip: Allow the resin to cure for the full amount of time recommended by the manufacturer! If you attempt to grind down the resin before it is properly cured, you will gum up your grinding bits and sanding drums.
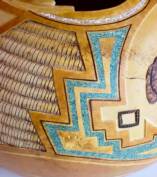
Some Finished Examples
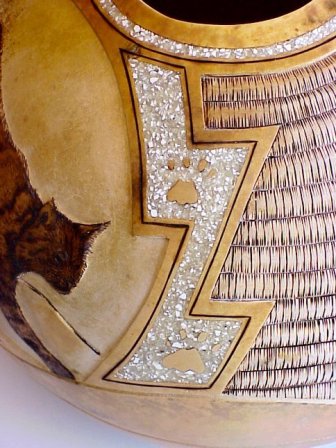
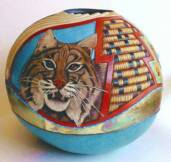
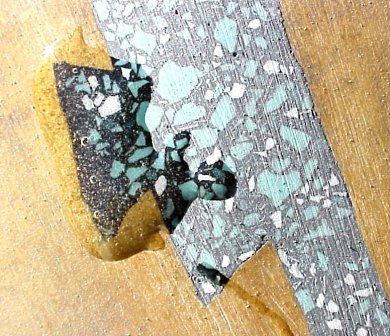
"Cat Tracks"
InLace at top (greenish area)
System Three at bottom (blue)
Supply Links:
Tutorial Links:
Begnning to grind the material down.
If grinding the resin reveals tiny depressions, fill with 5 minute epoxy and regrind level.
(Right) InLace has been ground smooth and sprayed with a sealer.
Questions?
Comments?
Buy Inlace brand products at this website.
Here is a fabulous example of using InLace in a very creative way. This piece, entitled "Sticks and Stones". was done by Cindy Lee. She originally conceived this piece as a way to show many different colors and combinations of InLace and InLace additives. The "pebbles" are raised and polished in a beautiful cabachon effect. You can see more of Cindy Lee's work at: